 Loading... Please wait...
Steeroids Installation - GM
By Eric Flavin
By definition a Pro Touring car must have excellent stopping and handling. There are three components to the handling segment: tires, suspension and steering. You can improve steering response by using a quicker ratio unit (wider and lower profile tires also improve response). A quick ratio box is fine but recirculating ball steering boxes aren't terribly precise no matter how well they are built.
If you really want a precise steering setup, a rack and pinion offers a 30-year leap forward in steering technology for your Chevy. Nearly all new cars come equipped with rack and pinion steering. Most people have grown accustom to the feel of it because they drive modern cars to work every day. When you take the fun Chevy out for the weekend you are suddenly and quite literally placed in the 1960's when steering was as vague as gas prices (nobody was very concerned about either). Even with all new components, do you find yourself sawing the wheel back and forth a little to keep it on the road? Do you find that in the corners you have to chase the car to hold the line you want?
So you say, the only way to add a rack and pinion is to chop and weld or buy a giga-buck complete front sub-frame? Not so, Speed Direct offers a bolt-on rack and pinion kit for 1st Generation F-bodies and 2nd generation X-bodies (68-74 Nova). Know as Steeroids this kit just bolts onto the sub-frame. You don't have to drill any holes or weld anything. In fact, you can put your old steering back on the car if you ever need to. The Steeroids kit uses a power assisted GM steering unit. You've heard the slogan Keep your GM car all GM? Well, there's none of this Mustang II/Pinto stuff in this kit. The R&P is a performance oriented rebuilt unit used in late 80s to early 90s GM cars.
Bolting on this kit will make a significant improvement in the overall drivability and responsiveness of your car. The first thing you will notice is the quicker ratio. Stock ratios usually yield between 3.5 or 4 turns lock to lock. That's pretty slow. Autocrossing or just fast, mountain road driving becomes a chore with those ratios. Steeroids yields about 2.75 turns lock to lock. Once you get used to the responsiveness of the steering you will notice that your car now drives exactly where you point it. Roll into a long sweeping corner and the steering wheel can be held in one position. No more of the constant adjustments just to keep the car in the lane. Suddenly your car is driving like a new car and I don't mean when your car was new. I mean it drives like a 2000 model year car! (At least it steers like one, it won't fix your stumbling carb or your soft brake pedal).
The kit comes complete with everything you need for installation. A power steering pump is not included but you can use your stock pump. An interesting note, you can run the system without any power assist. Just leave the plugs in the in/out ports. Steering effort is about the same as the stock manual steering box.
Installation is a straightforward process using simple hand tools. The only special tool you need is a pickle fork to remove the tie rods for the steering arm. The whole project takes 3 to 5 hours to complete.
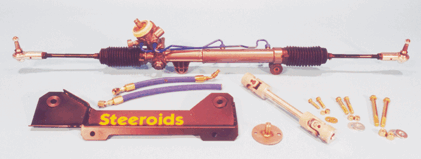
This is the complete Steeroids kit. All the fasteners and hoses are supplied.
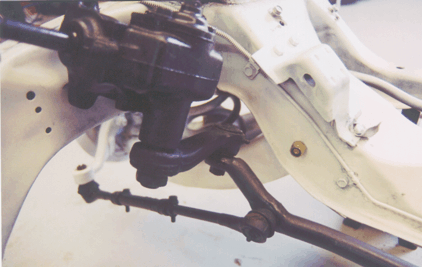
Once the car is securely on jack stands begin removing the old steering system. It is much easier to remove the system as a complete unit. There are two bolts attaching the rag joint to the steering column (remove these) and three for the steering box. Remove two of the steering box bolts but leave the last one in for later.
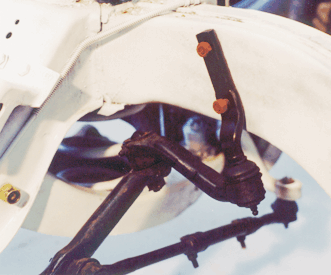
On the passenger side the idler arm is attached with two bolts, remove these now.
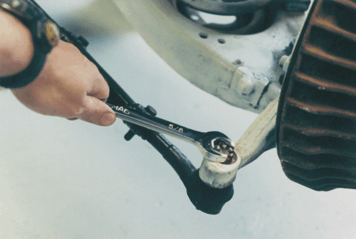
Both tie rods can be removed at this time. You may need a pickle fork to separate the rod end from the steering arm.
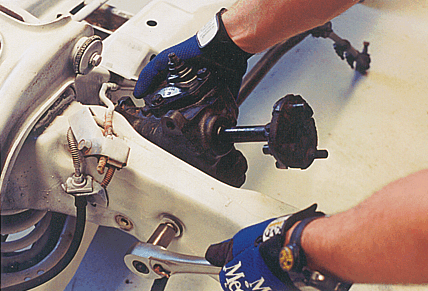
Now there is only one bolt holding the entire system in the car. If you are working underneath the car, make sure you support the steering box so it doesn't land on your head. Remove the final bolt while supporting the box.
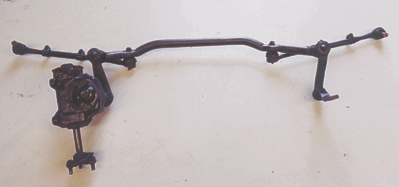
SPAN You can now pull the entire steering system out of the car. With only nine fasteners for the whole assembly, it takes 25 or 30 minutes to get to this stage.
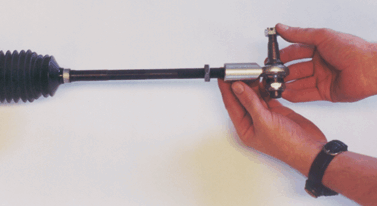
Thread the jam nuts and tie rods onto the rack and pinion unit. Be sure you thread an equal amount on both tie rods, this will insure the steering will be centered.
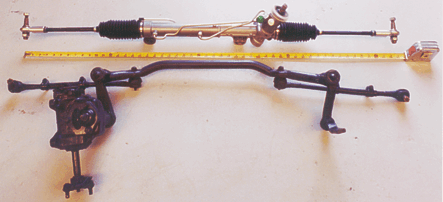
Measure the old steering and match the new to that dimension. This will get your alignment NEAR the ballpark. It is a good idea to measure the distance between the steering arms when the system is still on the car. Match that dimension when the new system is installed and you should have a pretty close toe alignment.
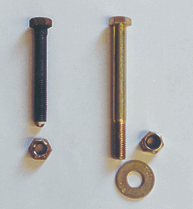
The stock a-arm bolts (two of them) must be replaced with longer bolts supplied in the kit.
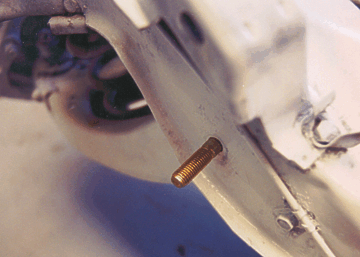
Install the bolts in the aft, lower a-arm mount. You may need to grind a taper (like the factory bolts) to get them to go through.
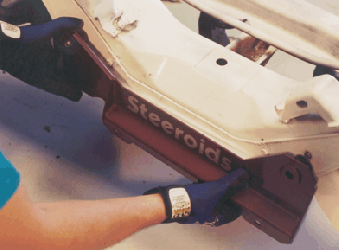
The bracket must be installed one bolt at a time because they are angled. Push the bracket against the frame, the holes will line up so the other bolt will slide in.
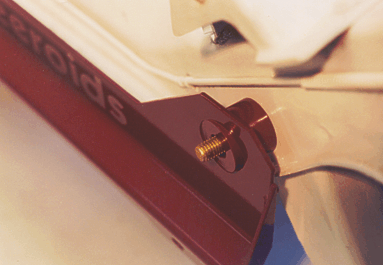
Detail of lower a-arm attachment with bracket in place.
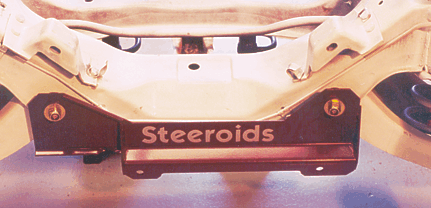
Washers are placed on the bracket side and the bolts are torqued to 80 Ft-Lbs. Elastic stop nuts are supplied. If these are removed more than twice, they must be replaced with new ones because they won't hold anymore (the nylon has expanded too much).
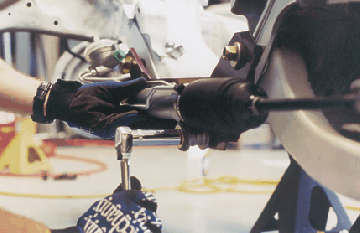
The rack and pinion unit can be installed. The two bolts are torqued to 59 Ft-Lbs.

The universal shaft has an adapter that bolts to the steering column. The other end is a Double d that slides onto the pinion shaft.
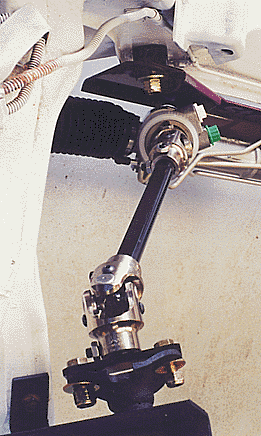
Bolt the adapter to the steering column. Use a high strength thread locker on the setscrew for the pinion shaft. Tighten the jam nuts with a ½ inch wrench or socket.
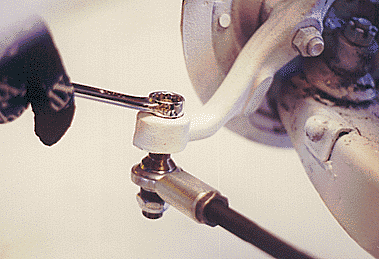
Bolt the tie rods to the steering knuckle. Torque to 35 Ft-lbs and continue to tighten until the cotter pin hole lines up. Install the cotter pin.
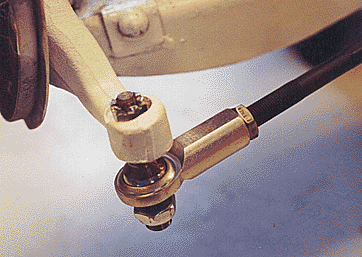
The tie rods consist of a tapered stud and a spherical rod end. They are adjustable for bump steer by moving the spacer from the bottom to the top. Varying thickness spacers can be fabricated or purchased to fine tune even more.
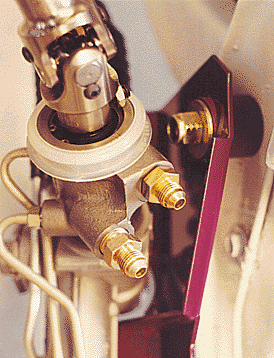
Now install the power steering hose adapters. These adapt the metric threads to a more common SAE flare. Lubricate the o-rings with power steering fluid. The large fitting is torqued to 21 Ft-Lbs and the small one to 13 Ft-lbs.
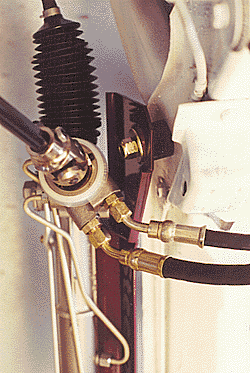
The high-pressure hose has crimped fittings on both ends, this attaches to the large fitting on the rack. The return hose has only one end. It attaches to the small fitting.
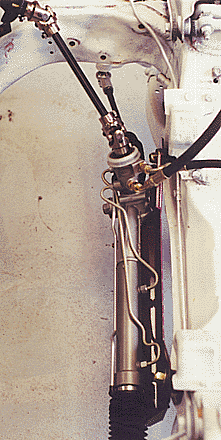
The installation is now complete. Now go over every bolt on the system, even ones you didn't touch. Make sure all are tight. You may have to re-center the steering wheel but wait until the toe is properly set.
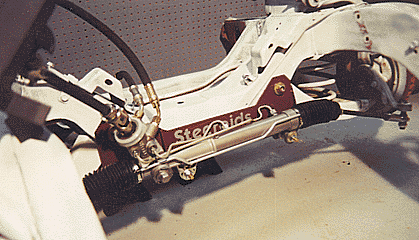
The power assist system must be filled with fluid and bled. This is accomplished by turning the wheels all the way to the left then adding fluid to the cold mark on the dipstick. Start the car and allow it to idle. Keep the level topped to the cold mark. Now turn the wheels side to side but not to the stops. Continue to check the fluid level. Allow the engine to run a few minutes before shutting off. Add fluid as needed.
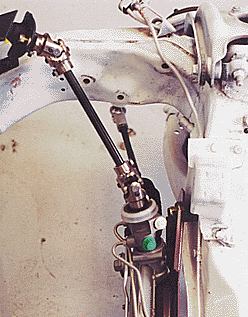
IIf you are going to run the unit without power assist, simply leave the plugs in.
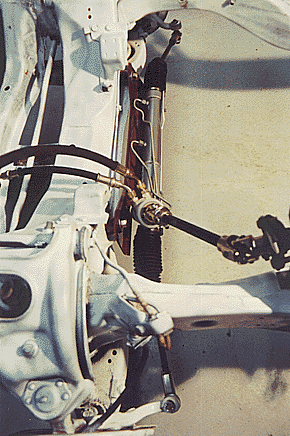
The completed installation is a clean and trick looking setup that your cruising or car show buddies are sure to gawk over. All this AND your car will be much easier to drive.
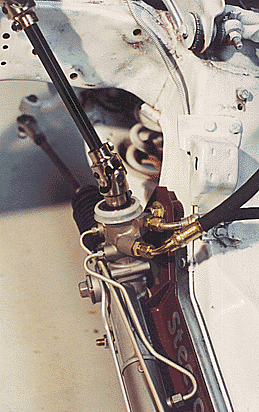
You never knew converting to rack and pinion was so easy.

